




Table Of Contents
Passivation Stainless Steel
Passivation is a controlled chemical treatment that removes free iron and surface contaminants so the chromium-rich passive film can reform on stainless steel. Require it after machining, welding, or grinding, and always before shipping parts into medical, aerospace, food, or pharmaceutical environments. Skip it, and you’re gambling on rust spots showing up on a customer’s dock instead of yours.
TL;DR:
- Passivation is essential after fabrication steps like welding or grinding to ensure the chromium-rich film can reform and prevent rust.
- The critical measure of a successful passivation is achieving a chromium-to-iron ratio of at least 1.5:1, not just surface appearance.
- Industries such as medical, aerospace, pharmaceutical, food, and electronics require verified passivation through specific standards and testing.
- Proper process control, including thorough cleaning, precise chemical treatment, and documented verification, is vital for reliable passivation results.
- Failures mainly result from inadequate cleaning, cross-contamination, or poor rinsing, which can be fixed by re-cleaning and re-passivating with proper documentation.
What Happens Chemically During Stainless Passivation?
Stainless steel resists corrosion because of a passive film only 1 to 5 nanometers thick sitting on the surface. That layer is mostly chromium oxide, and it’s self-healing under normal atmospheric exposure, which is why a scratched stainless sink doesn’t rust the way a scratched steel one does. The problem is that fabrication wrecks this film before it ever gets a chance to protect anything.
Cutting, grinding, welding, and machining all smear microscopic particles of free iron into the surface and physically disrupt the oxide layer. Heat from welding forms tint and oxide scale that’s iron-rich rather than chromium-rich. Even clean handling with the wrong tools, think carbon-steel clamps or shared grinding wheels, transfers iron onto a surface that’s supposed to be chromium-dominant. Every one of those embedded particles becomes a tiny corrosion initiation site, a spot where rust starts long before the surrounding metal shows any sign of trouble.
Passivation strips that free iron chemically and lets the chromium oxide film rebuild on a now-clean surface. The result engineers actually measure is the surface chromium-to-iron ratio, and ASTM’s own guidance treats a Cr:Fe ratio of 1.5:1 or higher as the benchmark for a properly passivated surface. That ratio is the real report card, not the shiny appearance of the part.
A few things worth keeping in mind about this process:
- The passive film reforms naturally in air, but passivation accelerates and completes the process on freshly machined surfaces.
- Free iron doesn’t announce itself visually. A part can look flawless and still fail a copper sulfate test.
- The Cr:Fe ratio matters more for corrosion performance than surface shine or mechanical polish.
- Different fabrication steps damage the film to different degrees; welding does more damage than laser cutting, which does more than light bending.
Grasp this mechanism and the rest of the process, why nitric and citric acids work, why rinsing matters, why re-passivation after welding is non-negotiable, follows logically instead of feeling like an arbitrary checklist item.
Which Industries Actually Require Passivation?
Not every stainless part needs passivation. A decorative bracket in a dry indoor environment can usually skip it. But once a part enters a regulated or high-consequence application, passivation stops being optional and starts being a contract requirement.
- Medical device manufacturing. Surgical instruments, implantable components, and diagnostic equipment housings all need documented corrosion resistance, and FDA cGMP expectations push toward validated surface treatment for anything that touches a patient or a sterile process.
- Aerospace. Airframe brackets, fasteners, and hydraulic components face cyclic stress and environmental exposure where a single rouging failure can ground equipment.
- Pharmaceutical and biotech processing. Tanks, piping, and mixing vessels need surfaces clean enough to resist rouging under repeated sterilization cycles, an area where FDA guidance on surface cleanliness sets the baseline expectation.
- Food and beverage equipment. Processing lines, conveyors, and tanks need corrosion resistance that survives daily washdown with caustic cleaners.
- Semiconductor and electronics. Ultra-clean environments where even microscopic iron contamination can compromise a process.
The fabrication triggers matter as much as the industry. Welding heat tint, mechanical grinding, embedded metal chips from tooling, and residual cutting oils all strip or contaminate the passive layer regardless of what the part is used for. Skip passivation after those operations and you’ll usually see one of three failure modes eventually: rouging (that reddish brown bloom on stainless tanks and piping), localized pitting corrosion, or outright customer rejects during incoming inspection. Rouging in particular tends to show up months after installation, long after the fabricator has moved on to the next job, which is exactly why the spec should get nailed down before the part ships.
What Do ASTM A967 And A380 Actually Require?
ASTM A967 is the specification most fabricators reference by name, and it defines the chemical passivation treatments themselves, nitric, citric, and electrochemical methods, along with the verification testing needed to confirm the treatment worked. It doesn’t just say “passivate the part.” It spells out immersion parameters, rinsing requirements, and which acceptance tests apply to which alloy families.
ASTM A380 covers the broader practice: cleaning, descaling, and passivation of stainless steel parts, equipment, and systems. Where A967 defines the passivation chemistry, A380 defines the surrounding cleaning practice and the inspection methods used to confirm a clean, passivated surface. Contracts that cite both standards together are asking for the full package: proper pre-cleaning, correct chemical treatment, and documented verification.
Two industry-specific standards show up when the application gets more demanding:
- AMS 2700 governs aerospace-grade passivation, with tighter process control and testing rigor than general commercial work, and it’s frequently paired with Nadcap accreditation as proof of process control.
- ASTM F86 applies to surgical implants, covering surface preparation standards for metallic medical devices where corrosion failure has direct patient safety consequences.
For acceptance testing, three checks come up constantly on inspection sheets:
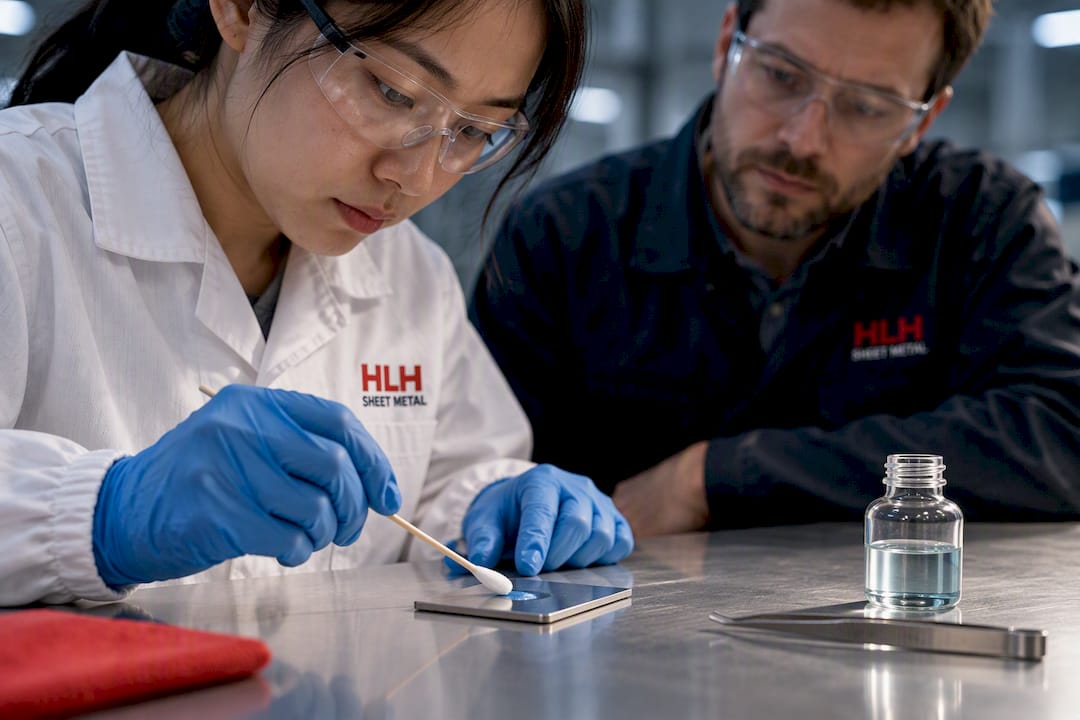
- Copper sulfate test. A blue copper sulfate solution applied to the surface; if it turns pink or copper colored, free iron is present and the part fails.
- Water-break test. Water applied to a clean surface should sheet evenly; beading or gaps indicate residual oils or contamination.
- Ferroxyl test. A more sensitive chemical indicator for free iron, often used where the copper sulfate test isn’t rigorous enough.
Specify the standard by number on the purchase order, not just “passivate per spec.” A967 and A380 each cover distinct scope, and a vague callout invites a vendor to interpret the requirement however’s cheapest.
Nitric, Citric, Or Electropolish: Which Passivation Method Fits?
All three approaches accomplish the same chemical goal, stripping free iron and letting the chromium oxide layer rebuild, but they get there through different chemistry, and the choice affects cost, safety, and environmental compliance more than it affects the final Cr:Fe ratio.
- Nitric acid immersion. This is the traditional method, and it remains the strongest option for heavy scale removal or when a shop needs faster reaction times at ambient temperature. Nitric acid is more reactive by nature, which makes it effective on tougher contamination but also means tighter safety controls: fume extraction, acid-resistant tanks, and careful neutralization before disposal. Shops running high volumes of general commercial stainless often default to nitric because the process is well understood and forgiving of minor parameter drift.
- Citric acid immersion. Citric acid has become the preferred method in pharma, food, and medical work for a straightforward reason: it’s dramatically less hazardous to handle and dispose of, and it does the job at lower concentrations. The tradeoff is tighter temperature and time control, since citric acid is less forgiving of parameter drift and can attack the base metal if a bath runs too hot or too long. Engineering guidance comparing the two chemistries consistently points toward citric-first strategies wherever environmental and disposal rules are strict, which increasingly means most regulated industries.
- Electropolishing. This isn’t strictly passivation, it’s an electrochemical process that both smooths the surface and removes free iron simultaneously, often producing a superior Cr:Fe ratio compared to chemical immersion alone. The most demanding applications, high-purity pharma vessels and implantable devices among them, frequently combine electropolishing with a follow-up passivation step for maximum corrosion resistance. It costs more and takes longer, but for a part that can’t afford a single pit, that’s usually money well spent.
One safety issue deserves a direct callout: hydrogen embrittlement. It’s primarily a concern with electrochemical treatments and certain cleaning pretreatments on high-strength alloys, where hydrogen atoms diffuse into the metal lattice and cause delayed cracking under stress. Fastener manufacturers and anyone working with precipitation-hardened stainless grades should specify embrittlement relief baking as part of the process, not as an afterthought.
How Do You Run A Passivation Process Correctly?
Get the sequence wrong and even the right chemistry won’t save the part. Passivation only works on a surface that’s already clean, often requiring an adhesion promoter for optimal coating performance, which is the single most misunderstood point in the entire process (ASTRA PA® — Adhesion Promoters | ASTRA CHEMICAL).
- Pre-clean thoroughly. Alkaline baths, ultrasonic cleaning, or solvent degreasing remove cutting oils, shop dirt, and handling residue before the part ever sees an acid bath. Skipping this step is the number one cause of passivation failure, because passivation is a finishing step, not a cleaning step, and it can’t compensate for a dirty surface.
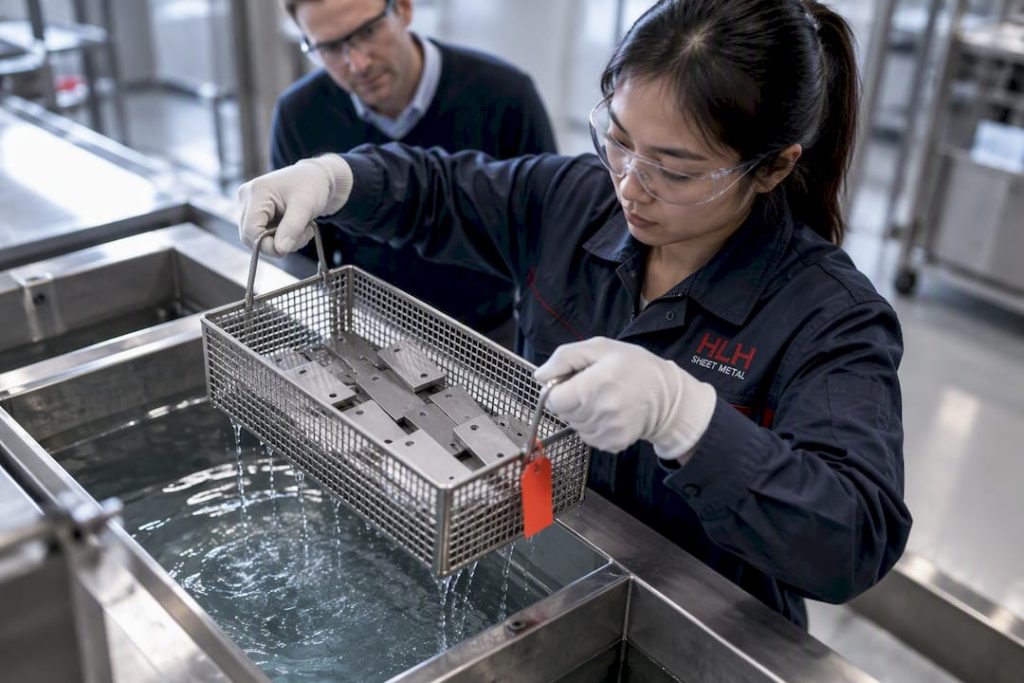
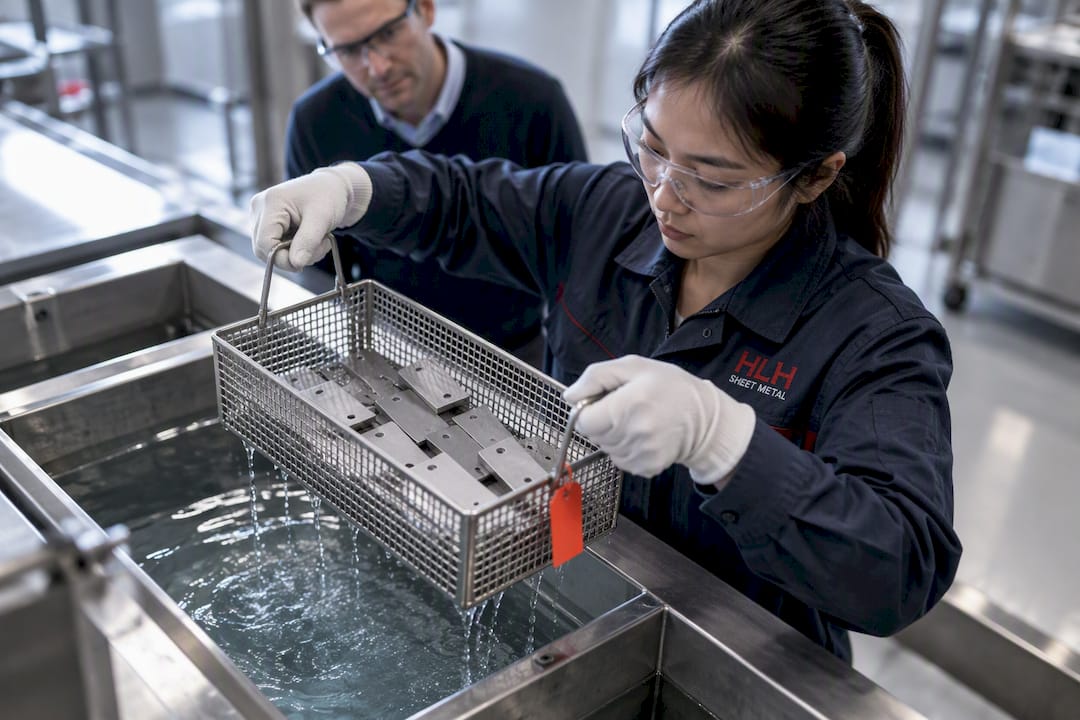
- Rinse with deionized or reverse-osmosis water. Tap water carries minerals and chlorides that can redeposit on the surface and undermine the whole point of the exercise.
- Immerse or circulate in the passivation bath. Time and temperature depend on the chosen acid and the alloy grade; nitric baths typically run at lower temperatures with longer dwell times than aggressive citric formulations, though exact parameters vary by specification.
- Rinse in cascade stages. Multiple rinse tanks, each cleaner than the last, prevent acid residue from ever reaching the drying stage.
- Dry immediately and completely. Trapped moisture is an invitation for water spotting and localized corrosion before the part even leaves the shop.
A few shop-floor habits separate a reliable passivation line from one that produces inconsistent results:
- Keep dedicated tooling and racks for stainless work; carbon steel contact anywhere in the process reintroduces the exact contamination passivation is meant to remove.
- Monitor bath concentration and temperature on a schedule, not by feel.
- Document every batch: chemistry, time, temperature, and the operator who ran it.
- Treat any post-passivation welding, grinding, or machining as an automatic trigger for re-passivation, since those operations reintroduce free iron just as effectively as the original fabrication did.
That last point trips up more shops than any other single issue. A part gets passivated, then a secondary weld or a drilled mounting hole gets added afterward, and nobody flags it for re-treatment. The part ships passivated in name only.
How Do You Verify That Passivation Actually Worked?
Verification is where a lot of shops cut corners, and it’s exactly where a buyer should push back hardest. A passivated-looking surface and a passivated surface are not the same thing.
The copper sulfate test, run per ASTM A380, is the standard first check: apply the solution, wait roughly six minutes, and look for color change. No color change means no exposed free iron. A pink or copper tint means the test failed and the part needs to go back through the process.
Beyond copper sulfate, a few complementary checks round out a solid inspection protocol:
- Water-break test for surface cleanliness and residual oil contamination.
- Wipe tests using a clean white cloth to check for visible residue after rinsing and drying.
- Ferroxyl test for higher-sensitivity free iron detection, often reserved for critical medical or aerospace lots.
- Salt spray testing (ASTM B117) for longer-term corrosion resistance validation on critical parts, though this is a slower, destructive test typically reserved for qualification runs rather than every-lot inspection.
Pro Tip: Don’t rely on a single spot check for a large lot. Sample at multiple points per part and across multiple parts per batch, since bath concentration and rinse water quality can drift mid run without anyone noticing until the last few pieces come through underdone.
For documentation, lot acceptance should tie back to batch records: which bath, what chemistry, what temperature and time, which operator, and which test method confirmed the result. A Cr:Fe ratio of 1.5:1 or better is the metallurgical target behind all of these pass/fail calls, even when the shop floor test is a simple color change on a swab.
Why Does Passivation Fail, And How Do You Fix It?
Most passivation failures trace back to one of three root causes, and none of them require exotic troubleshooting to fix.
Inadequate pre-cleaning tops the list by a wide margin. Oils, shop dirt, or oxide scale left on the surface block the acid from reaching the free iron underneath, so the part comes out of the bath looking treated while still carrying contamination. Cross contamination from shared tooling, racks, or tanks used on carbon steel is the second major cause, and it’s sneaky because the shop may have run a flawless passivation cycle on a surface that got recontaminated five minutes later. Poor rinsing rounds out the top three, leaving acid residue that continues reacting with the metal after the part leaves the line.
Remediation follows a fairly direct sequence:
- Re-clean the part completely, don’t just re-run the passivation bath on a still-dirty surface.
- Re-passivate using fresh bath chemistry, not a bath that’s drifted out of concentration.
- Escalate to electropolishing if repeated chemical passivation attempts still fail acceptance testing, since it removes a thin layer of base metal along with the contamination.
Pro Tip: In a shop running multiple metal types, color-code tooling, brushes, and racks by material family. A single stray carbon-steel wire brush used “just this once” on a stainless part can undo an entire passivation batch, and it’s the most common cross-contamination story in production floors.
What Does HLH Sheet Metal Check Before And After Passivation?
Consistent passivation results come down to shop discipline more than chemistry. HLH SHEET METAL builds several checkpoints into its surface finishing workflow specifically to catch the failure modes described above before they reach a customer.
Before any part enters a passivation bath, the checklist includes:
- Verifying material certificates match the specified stainless alloy grade.
- Running visual and wipe tests to confirm the surface is free of visible oils, scale, or handling residue.
- Confirming dedicated stainless tooling and racks were used through every prior fabrication step.
On the shop floor, process controls include corrosion-safe rinsing cascades using deionized or reverse-osmosis water, documented drying procedures that prevent water spotting, and handling protocols that keep finished parts away from carbon steel contact points during packaging.
Documentation ties it together: batch records tracking bath chemistry and parameters, test logs recording which acceptance method was used on which lot, and a record of whichever customer-specified acceptance criteria applied to that job, whether that’s a straightforward copper sulfate pass or a documented Cr:Fe ratio for a regulated application. That paper trail is what a procurement engineer should be asking for before signing off on a stainless fabrication order, not after a part fails in the field.
What Procurement Teams Get Wrong About Passivation
The mistake I see most often is treating passivation as a checkbox rather than a spec. Naming the standard on a purchase order means nothing if nobody asks for the test report behind it. A shop-level copper sulfate pass is fine for low-risk parts, but anything going into a regulated or safety-critical application deserves a lab-verified Cr:Fe ratio, not just a color check on a swab. That documentation gap is exactly where warranty disputes and field failures originate two years down the line.
— Nash
Get Passivated Stainless Parts With Documentation, Not Just A Promise
HLH SHEET METAL runs surface finishing as part of an ISO-certified quality process across multiple manufacturing plants in China, built to support both prototype runs and large production volumes without sacrificing the traceability that regulated buyers need. That combination matters if you’ve been stuck choosing between a fast local shop with thin documentation and a slower overseas vendor with good paperwork but a six-week lead time.
When you submit an RFQ for stainless steel fabrication, specify the passivation standard by number (A967, A380, AMS 2700, whichever applies to your industry) and request the acceptance test method you need documented, whether that’s a copper sulfate report or a Cr:Fe ratio from lab analysis. The company’s English-speaking support team can confirm process parameters and turnaround before you commit. Get a quote started and put the documentation requirement in writing from the first conversation, not after the parts arrive.
FAQ
Can I Passivate Stainless Steel At Home?
Small citric-acid passivation kits exist for hobbyist and light commercial use, and they can work for basic corrosion protection on non-critical parts. For anything going into a regulated application, home passivation lacks the bath control, rinse water quality, and documented testing that ASTM A967 and A380 require, so it won’t satisfy a customer or auditor asking for verification records.
What Happens If Stainless Steel Is Not Passivated?
Unpassivated stainless steel keeps embedded free iron from fabrication on its surface, which becomes a corrosion initiation site under moisture or chemical exposure. Over time this shows up as rouging, localized pitting, or visible rust spots, often well after the part has already been installed and put into service.
How Long Does Passivation Last On Stainless Steel?
A properly passivated chromium oxide layer is stable and effectively permanent under normal atmospheric conditions, since it’s self-healing when the surface stays undamaged. Any subsequent welding, grinding, or machining reintroduces free iron and breaks that protection, which is why re-passivation is routine after any secondary fabrication step.
Can 316 Stainless Steel Be Passivated?
Yes, commonly used stainless grades for passivation include those with added molybdenum content for enhanced corrosion resistance, particularly in medical and marine applications. The same nitric, citric, and electrochemical methods defined in ASTM A967 apply, though bath parameters may differ depending on the specific grade.
Recommended
- Specify Chromate Conversion Coating: Standards, Bath Controls, Shop QA
- Aerospace Metal Fabrication in China | Essential QA Standards
- The Most Corrosion-Resistant Metals and How to Choose One

