




Table Of Contents
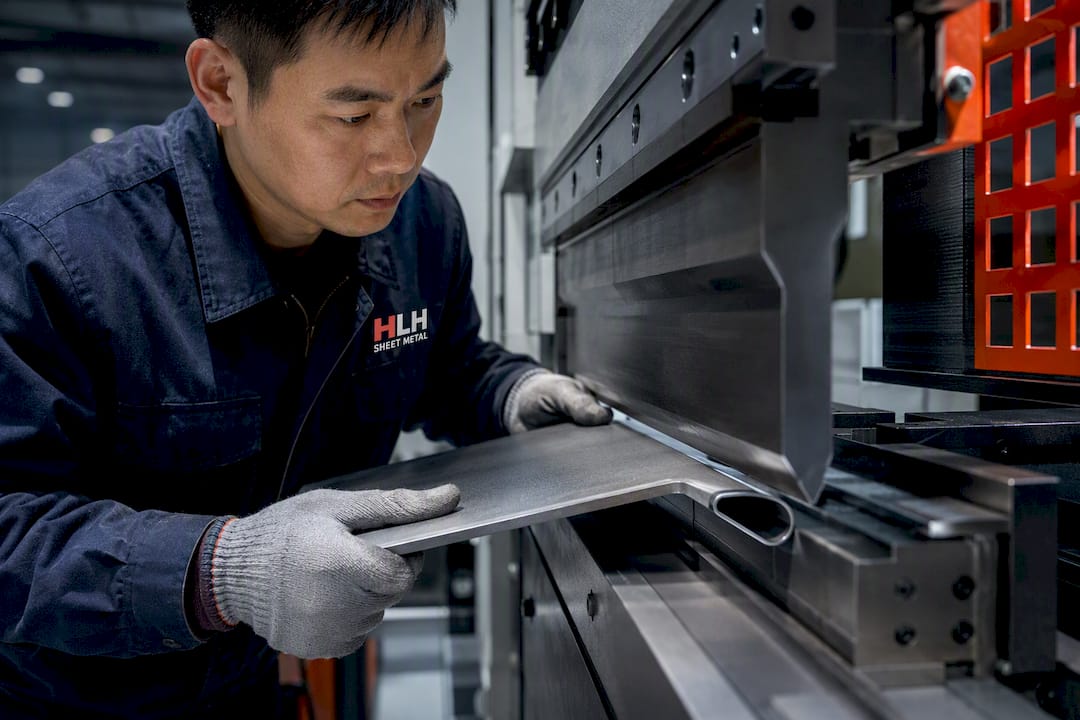
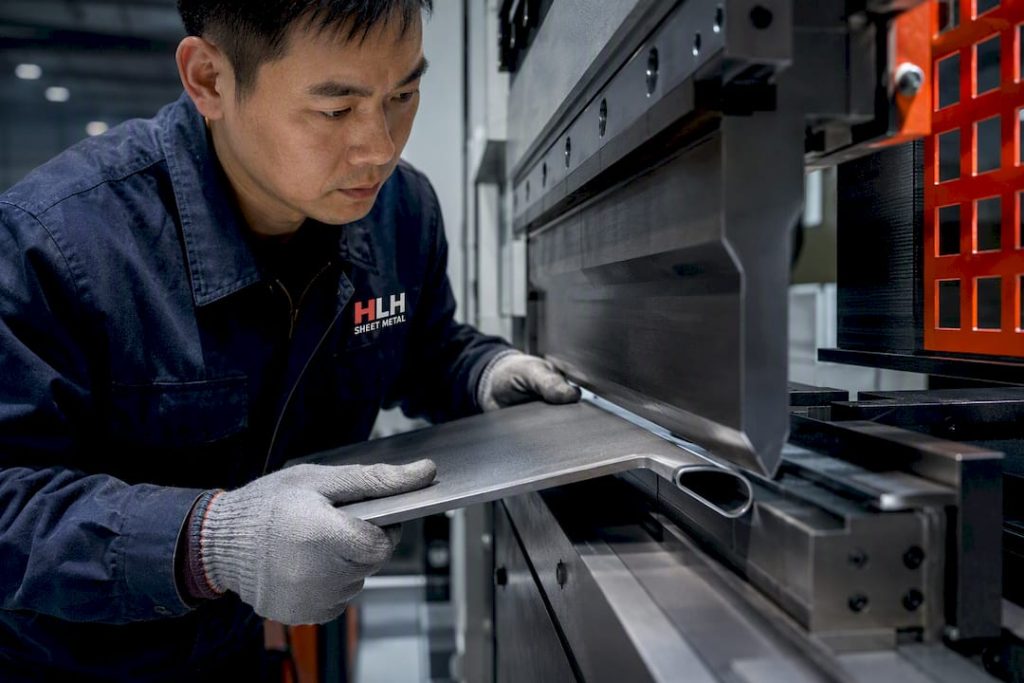
Sheet metal hemming folds an edge back onto itself in two steps, an acute prebend followed by flattening, to reinforce the edge, bury sharp burrs, and improve the cosmetic finish. Engineers typically call for it on panels that get handled by hand, on enclosures where a raw edge is a liability, or wherever a mating part needs a rolled surface instead of a knife edge. Hem type is treated as a design decision, not an afterthought, and The Fabricator covers the tooling logic behind why.
TL;DR:
- Open hems require significantly less force and tooling wear compared to closed hems, making them more cost-effective for thicker or harder materials.
- Proper relief design, including radiused corners and correct inside radius, is crucial for avoiding cracks and defects during hemming, especially on high-strength alloys.
- A single-station hemming tool suits short, stable parts, while staged tooling with operator support better handles longer or heavier panels.
- Inspection for cracking, proper seating, and hem width allows early detection of defects, reducing rework and ensuring quality.
- Providing detailed DFM information upfront, including material, thickness, hem type, and relief geometry, is essential for accurate tooling, tonnage estimation, and successful production.
What Is Sheet Metal Hemming, Exactly?
Hemming and its close cousin, seaming, both roll a sheet edge onto itself, but they solve different problems. Hemming folds one edge flat against itself for stiffness and safety; seaming joins two edges together, usually to lock two panels along a common seam, and typically demands more tonnage to complete the fold. That distinction matters when you’re speccing a part: if you’re joining two sheets mechanically, you’re seaming; if you’re finishing one panel’s edge, you’re hemming.
The process itself is old, mechanically simple, and still one of the most reliable ways to strengthen a thin-gauge edge without adding a separate part. Wikipedia’s entry on hemming and seaming frames it as a subset of bending, and that’s the right mental model. You’re not adding material or joining components. You’re refolding what’s already there to change how the edge behaves under load and under a hand.
Closed, Open, Teardrop, Or Flat: Which Hem Fits?
Hem geometry isn’t a style choice. It’s a function of material thickness, temper, and how the part gets handled downstream.
- Closed hem. The edge folds flat against itself with zero gap, giving the strongest, most flush finish. It also demands the most tonnage and carries the highest risk of cracking on stiffer alloys or thicker stock.
- Open hem. The fold stops short of full closure, leaving a small gap. Tonnage drops noticeably, and the edge is still far safer than a raw cut, which makes this the default for many enclosure panels.
- Teardrop hem. A rounded pocket replaces the tight closed fold. This is the go-to for thicker stainless steel, where forcing a closed hem risks micro-fractures at the bend.
- Flat or partial hem. A shallower fold used mainly for cosmetic edges or light stiffening where full closure isn’t structurally necessary.
Closed hems win on strength and appearance. Open and teardrop hems win on manufacturability, especially past 1.5 mm or on harder tempers.
How Does The Two-step Hemming Process Work?
Every hem, regardless of geometry, follows the same basic sequence on a press brake.
- Acute prebend. The brake forms the edge past 90 degrees, typically to somewhere between 30 and 45 degrees of remaining gap, using an acute angle die.
- Flattening. A second hit, usually with a flattening die or a hemming-specific tool, closes the fold down to its final geometry, whether that’s fully closed, open, or teardrop.
- Tooling selection. Shops use dedicated acute die sets and flattening dies staged near each other to cut changeover time, or single-station hemming tools that combine both moves for short, stable hems.
- Setup count decision. Short parts on a stable setup often run through a single-station tool in one pass. Long parts, or parts where shut-height between the acute and flattening tools doesn’t match cleanly, usually need two separate setups.
- Fixturing and safety checks. Long or heavy panels often need a second operator supporting the far end during flattening, plus a check that the part is seated flush before the ram closes, since an unsupported hem folds unevenly.
Skipping the prebend and trying to flatten in one hit is the fastest way to buckle the edge or blow past your press’s rated tonnage.
How Much Tonnage Does Hemming Require?
Closed hems need substantially more force than open hems because you’re compressing the fold down to zero clearance, and that force climbs fast as thickness increases. A 1 mm closed hem and a 3 mm closed hem aren’t twice as different in tonnage. They’re an order of magnitude apart, which is why press selection has to happen before you commit to a hem type on a drawing.
The table below reflects general tons-per-meter ranges drawn from Wikipedia’s hemming and seaming reference data, covering common cold-rolled and stainless thicknesses.
| Thickness | Open hem | Closed hem |
|---|---|---|
| 1 mm | Lower tonnage range | Moderate tonnage range |
| 1.0 mm | Moderate tonnage range | Higher tonnage range |
| 1.5 mm | Medium tonnage range | High tonnage range |
| 2.0 mm | Medium to high tonnage range | High tonnage |
| 3 mm | High tonnage range | Very high tonnage |
| — | Very high tonnage | Usually impractical on standard equipment |
Pro Tip: Treat these ranges as a rough sizing check, not a quoting number. Alloy, temper, and grain direction shift actual force enough that identical thickness in mild steel versus stainless can land in different tonnage brackets entirely.
Past roughly 3 mm on a closed hem, most shops switch to teardrop or open geometry rather than push a standard brake past its rated capacity.
What DFM Rules Reduce Hemming Defects?
Bend relief is the single most common thing missing from drawings that fail first-article inspection. DAXIN’s bend relief guidance puts relief width in the 1.0T to 2.0T range as a starting point, where T is material thickness, with relief depth extending past the bend tangent line so the fold doesn’t tear at the corner.
A few rules consistently prevent rework:
- Use obround or radiused corner reliefs instead of square-cut notches; square corners concentrate stress exactly where you don’t want it.
- Set inside radius relative to thickness and temper, not a flat default; harder tempers and stainless generally need a larger radius to avoid cracking at the hem fold.
- Pay attention to grain direction on rolled stock. Bending across the grain is more forgiving than bending parallel to it, especially on hard tempers.
- Keep holes and slots a safe distance back from the bend line, and when tolerances are tight, form the hem before machining features near it rather than after.
- Sequence finishing correctly. If a part gets anodized or powder coated, the hem should be fully formed and inspected first, since coating buildup inside a tight closed hem can telegraph unevenly.
Pro Tip: If your quote package doesn’t specify relief width and depth explicitly, don’t assume the shop will guess right. A missing relief callout is one of the most common reasons a first-article part comes back with hairline cracks at the corners. A DFM guide for engineers walks through the callouts that matter most on hemmed parts.
Which Tooling Strategy Fits Your Part Length?
Thrust becomes the limiting factor once you’re hemming anything beyond a short, stable panel. The lateral force generated during flattening pushes back against the ram and the die, and on longer parts that force multiplies. Shops running high-volume hemming often use thrust-absorbing or hydraulic hemming tables specifically to protect the press and keep the fold consistent along the full length of the part.
- Single-station hemming tools combine the acute bend and flattening in one tool, which works well for short, stable hems where changeover time matters more than flexibility.
- Staged tooling, with acute and flattening dies set up near each other on the same brake, suits longer runs or parts where a single-station tool can’t clear the geometry.
- Shut-height matching between the two tool stages needs to be dialed in before production starts; a mismatch here is a common source of tool damage and inconsistent folds.
- Operator support on long or heavy panels keeps the far end from drooping mid-fold, which is often the real cause of an uneven hem, not the tooling itself.
Pro Tip: On runs longer than a meter or so, budget time for a dry run with an operator stationed at the far end. It catches uneven folding before it becomes a batch of rework. A forming process overview covers how staged tooling gets set up on production floors handling mixed part lengths.
What Causes Hem Defects, And How Do You Catch Them?
Most hemming defects trace back to one of three root causes: relief that’s too shallow, an inside radius that’s wrong for the material, or a press pushing more tonnage than the geometry can absorb.
- Edge cracking usually means the bend relief was undersized or the radius was too tight for the temper.
- Lifting or springback after flattening often points to insufficient tonnage or a die that closed before the fold fully set.
- Visible gaps in a supposed closed hem typically mean the press stalled short of full tonnage, or the part wasn’t seated flush going into the flattening stage.
Inspection should cover a visual check for cracking at the corners, a dimensional check on hem width and flatness, and for critical or cosmetic parts, a sample cross-section cut to confirm the fold closed cleanly through the full thickness. If a defect keeps recurring across a run, changing tooling or switching to an open or teardrop hem almost always costs less than continuing to rework closed hems that keep cracking.
What Proof Points Back HLH Sheet Metal’s Hemming Work?
Hemming reliably at scale depends less on any single tool and more on consistent process control across every run, which is where ISO-certified quality assurance and rapid prototyping earn their keep. HLH SHEET METAL runs both, backed by multiple manufacturing plants that let a prototype hem geometry get validated before it scales into a production order.
When requesting a quote on a hemmed part, include these details up front to avoid a slow back and forth:
- Material and alloy, plus temper if known.
- Nominal thickness and tolerance.
- Desired hem type (closed, open, teardrop, or flat) and why, if cosmetic or structural requirements drive the choice.
- A flat pattern or print showing bend relief width and depth.
- Any post-hem finishing requirements, since surface finish sequencing can change how the hem should be formed.
A complete package like this is usually the difference between a first-article part that passes and one that comes back for rework.
Safety Precautions And Best Practices In Hemming Operations
Hemming concentrates force into a small, fast-closing gap between the ram and the die, and that combination is exactly where hand and finger injuries happen on a press brake floor. The prebend and flattening stages both carry pinch-point risk, particularly on long panels where an operator is bracing the far end while the near end closes.
A few practices consistently reduce incident rates on hemming operations. Light curtains and presence-sensing devices at the point of operation are standard on modern brakes, and they should never be bypassed for speed, even on short, “simple” hems. Operators supporting long parts during flattening need clear hand-placement zones marked and enforced, since the instinct to steady a drooping panel closer to the die than intended is common under time pressure.
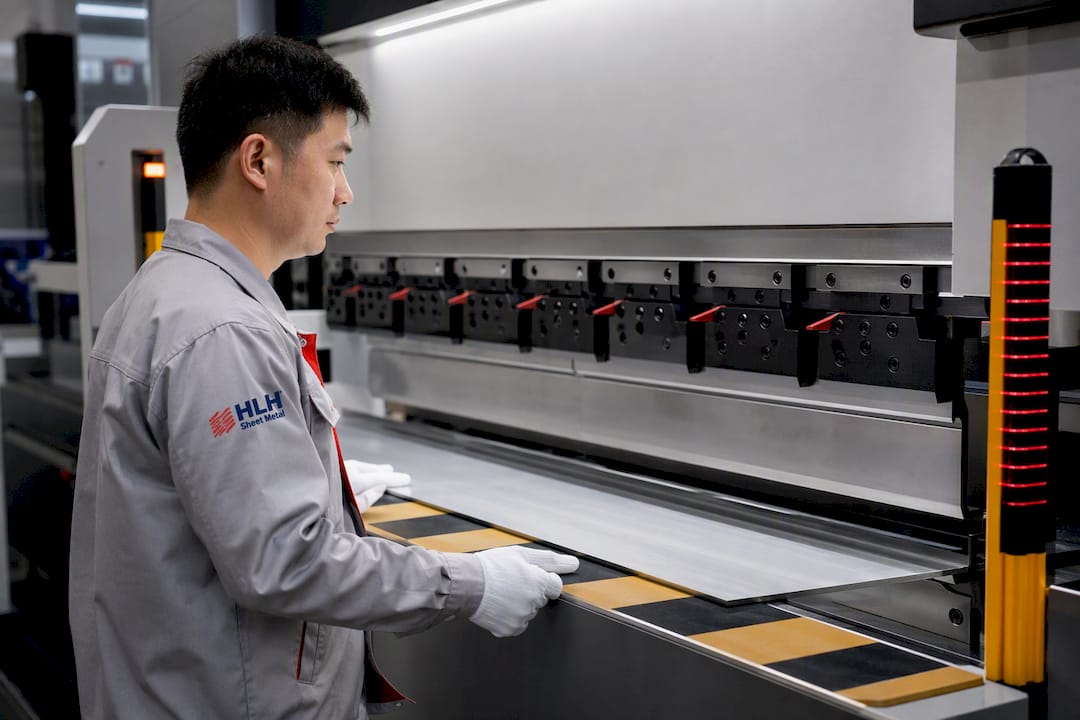
Tooling itself needs a pre-run check. A cracked or worn acute die can shatter or shift mid-stroke, and a flattening die that’s lost its shut-height calibration can generate unexpected thrust that kicks the part sideways. Both are preventable with a quick visual and dimensional check before a production run starts, not after the first bad part shows up.
Material handling matters too. Sheared or laser-cut edges going into the prebend stage are often sharp enough to cut through light gloves, so edge deburring before hemming isn’t just a cosmetic step. It protects the people loading the brake.
How Are Automation And Robotic Hemming Changing The Process?
Robotic hemming has moved from a niche automotive-line technology into a broader manufacturing tool, particularly for high-volume runs where consistency matters more than flexibility. A robotic hemming cell typically uses a roller-hemming head that walks the fold progressively along the edge, rather than a single press stroke closing the whole length at once.
That progressive approach changes the force profile substantially. Instead of one large tonnage spike across the full hem length, roller hemming applies smaller, repeated force along a moving contact point, which reduces the thrust the fixture has to absorb at any single moment. It’s a meaningfully different mechanical approach than press-brake hemming, and it tends to shine on curved or contoured edges that a straight-line brake stroke can’t easily follow.
For most custom and prototype sheet metal work, though, press-brake hemming with staged or single-station tooling remains the practical choice. Robotic roller hemming earns its setup cost on very high-volume programs, typically automotive body panels, where the same hem geometry runs thousands of times a month. Below that volume, the tooling and programming investment rarely pays back fast enough to justify it over a well-tooled press brake.
The gap between these two approaches is really a volume question more than a quality question. Both produce sound hems when set up correctly; the automation decision comes down to whether your run length justifies the fixed cost of a robotic cell.
What Finishing Steps Come After Hemming?
A formed hem isn’t a finished edge until it’s been deburred and, if the part calls for it, prepped for surface treatment. The flattening stage can push small burrs or sheared material into the fold, and those need to be cleared before the part moves to finishing, or they’ll show up as inconsistent coating thickness later.
Deburring a hemmed edge takes a lighter touch than deburring a raw cut edge, since you’re working around a closed or nearly closed fold rather than an open profile. Light abrasive finishing or tumbling works for most closed and open hems; teardrop hems, with their rounded pocket, sometimes need a finer touch to avoid flattening the intended radius.
Surface treatment sequencing depends heavily on hem type. Anodizing and powder coating both need the hem fully formed and cleaned before the part goes into the finishing line, since coating material can pool unevenly inside a tight closed hem if the fold has any residual gap. Open hems are generally more forgiving here because the coating can flow through the gap rather than getting trapped. Parts headed for anodizing in particular benefit from a post-hem dimensional check, since anodize buildup, while thin, can be enough to affect fit on a tightly toleranced closed hem.
For parts with cosmetic requirements, a visual inspection under good lighting after finishing catches issues that are invisible on the bare metal, particularly uneven coating pooling at the hem edge.
What Standards Govern Sheet Metal Hemming?
Hemming itself doesn’t have a single dedicated industry standard the way welding has AWS codes or fastener torque has ISO specifications. Instead, it sits inside broader sheet metal forming and quality frameworks that govern the part as a whole.
ISO 9001 quality management systems are the most common baseline requirement fabricators reference, since hemming quality checks, dimensional tolerances, and defect tracking all fall under a shop’s documented QA process rather than a hemming-specific code. Aerospace and medical device programs often layer additional requirements on top, calling out specific inspection sampling rates or cross-section testing frequency for critical hemmed edges, particularly where the hem is load-bearing or safety-related rather than purely cosmetic.
Material specifications matter more directly than forming-process specifications. The alloy and temper callout on a drawing, tied to ASTM or equivalent material standards, effectively sets the bend relief and radius requirements discussed earlier, since those DFM rules exist specifically to keep a given material within its safe forming limits during the hem’s acute bend.
For engineers writing specs, the practical move is to reference the governing quality standard for the industry (ISO 9001 as a baseline, with AS9100 for aerospace or ISO 13485 for medical devices layered on top), and let the drawing’s own DFM callouts, relief width, radius, and hem type carry the actual forming requirements. There’s no shortcut standard that replaces a well-specified print.
Which Hemming Method Is Most Cost-effective?
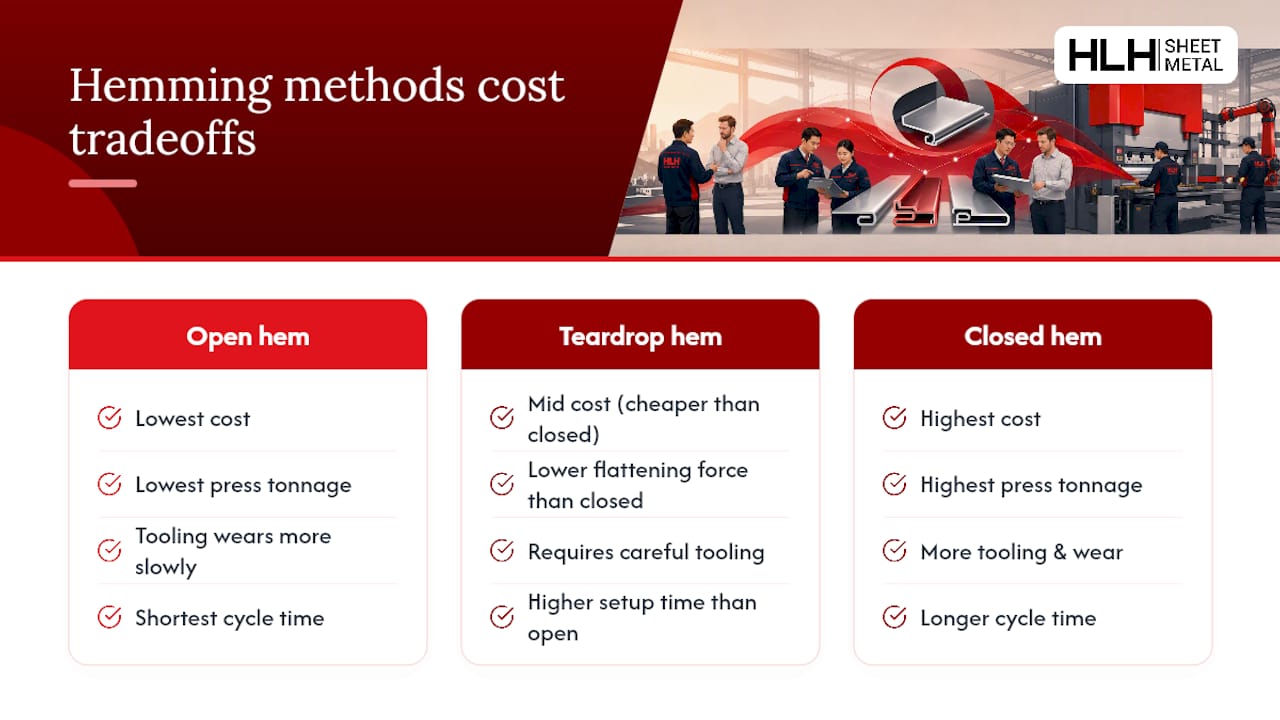
Open hems cost less to produce than closed hems on nearly every axis that matters: lower tonnage means a smaller press can run the job, tooling wears more slowly, and cycle time drops because the flattening stroke has less material to compress. If a part’s function doesn’t strictly require a fully closed edge, an open hem is usually the more efficient choice.
Closed hems earn their higher cost when the application genuinely needs the flush finish or the added stiffness, cosmetic panels facing outward on a product, or structural edges that see repeated handling. Paying the tonnage and tooling premium for a closed hem on a part that will sit inside an enclosure, never seen and rarely touched, is a common place where cost creeps in without adding real value.
Teardrop hems land in between on cost, generally cheaper than a closed hem on the same thickness because flattening force is lower, but they require more careful tooling and setup than an open hem, which shows up in setup time rather than press tonnage.
Setup count is the other major cost driver. A part that fits a single-station hemming tool runs faster and cheaper than one requiring two staged setups, so part length and shut-height compatibility deserve attention early in design, not after the quote comes back higher than expected. Rework costs, driven mainly by relief or radius mistakes, dwarf the cost difference between hem types, which is the strongest argument for getting the DFM details right the first time rather than optimizing hem choice alone.
What The Trade-press Data Actually Tells You
Most guidance on hemming treats it as a solved, almost mechanical decision: pick a hem type, look up a tonnage number, done. The tonnage tables and DFM rules of thumb are genuinely useful, but they’re starting points, not answers, and treating them as answers is where a lot of first-article failures come from.
The bigger gap I see in conventional advice is that it separates hem type selection from finishing and inspection planning, when in practice those decisions are tangled together. A closed hem that looks great on a drawing can become a coating headache on the finishing line, and nobody catches that until the part is already tooled. The engineers who get this right treat the hem, the relief geometry, and the finishing sequence as one decision made at the same time, not three separate steps handed off between departments.
If there’s one thing to prioritize first, it’s relief geometry, not hem type. A well-specified relief with the right radius for your material will forgive a lot of downstream tooling variation. A poorly specified relief will sabotage even the “right” hem choice. Get the drawing details precise before you argue about open versus closed.
— Nash
Get A DFM Review Before You Commit To A Hem Type
Guessing at bend relief and hem geometry is how first-article parts come back with cracked corners and blown tonnage estimates. Hemmed parts are run from prototype through production under ISO-certified quality assurance, so a relief callout gets checked before it ever reaches the brake, not after.
To get a quote moving, send over a flat pattern or print showing material, thickness, temper, and the hem type you’re targeting, closed, open, teardrop, or flat, along with any finishing requirements downstream. That’s enough for a first pass on tooling and tonnage feasibility. Start the conversation on HLH SHEET METAL’s sheet metal fabrication page and get a DFM review back before you lock the drawing.
FAQ
What Is Hemming In Sheet Metal?
Hemming folds a sheet metal edge back onto itself in two steps, an acute prebend followed by flattening, to reinforce the edge, bury sharp burrs, and improve appearance.
How Do You Hem The Edge Of Sheet Metal?
On a press brake, you form an acute prebend past 90 degrees with an acute angle die, then close the fold with a flattening die or single-station hemming tool; long parts often need two separate setups.
How Much Does It Cost To Bend Sheet Metal?
Cost depends on tonnage, part length, and setup count; open hems generally cost less than closed hems because they need less press force, less tooling wear, and shorter cycle times.
How Do You Hem Metal Flashing?
Thin flashing typically uses an open or partial hem formed with a simple brake or hand tool, since flashing rarely needs the full tonnage of a closed hem to achieve a safe, finished edge.
Should I Choose An Open Or Closed Hem?
Choose a closed hem when you need maximum stiffness and a flush cosmetic edge on thinner material; choose an open or teardrop hem on thicker or harder alloys where tonnage and cracking risk make a closed fold impractical.
Recommended
- Sheet Metal DFM: A Practical Design Guide for Engineers
- Sheet Metal Prototyping: A Rapid, Production-True Guide
- Sheet Metal DFM: CAD Settings That Cut China Production Costs

