





Table Of Contents

Fix rack cable management with one formula: vertical managers on both sides, horizontal managers between every patch panel and switch, both-end labeling, Velcro instead of zip ties, and service loops sized to reach the next rack unit without strain. Install that order before equipment goes in, and most emergency troubleshooting calls disappear. Start with four things this week: mount the managers, order patch cords in the right lengths, print labels, and write down what’s connected to what.
TL;DR:
- Installing vertical and horizontal managers before equipment minimizes time-consuming retrofits and ensures proper cable routing and airflow management.
- Keep patch cables between 1 to 3 feet and cross-rack connections within 5 to 7 feet to maintain neatness and reduce slack.
- Limit PoE+ bundles to approximately 24 cables and PoE++ bundles to around 12 cables to prevent heat buildup and power throttling.
- Label both ends of each cable with machine-printed, self-laminating tags and document key details in a database for accurate, quick troubleshooting.
- Use Velcro straps instead of zip ties for easier reconfiguration, and consider custom-fabricated parts for unique rack layouts or special requirements.
The Hardware That Actually Belongs In A Rack
A standard 19-inch rack needs a specific set of parts, not a grab bag of whatever the last vendor shipped. Vertical managers run floor to ceiling on both sides of the rack. Full-height units work for most builds; partial-height versions free up rack space in shallow deployments but sacrifice capacity fast once port counts grow. Look for hinge covers so you can access cable without unscrewing anything.
Horizontal managers sit in 1U or 2U slots between patch panels and switches. Finger duct styles suit dense fiber runs, while ring-style organizers handle mixed copper bundles better because they don’t crush cable jackets under load.
At the edges, brush strips and grommets protect cable jackets from sharp sheet metal edges and keep airflow from leaking out through open panel gaps. Round out the kit with D-rings and cable rings for anchoring runs mid-rack. Custom-fabricated brackets earn their cost only when a rack’s depth or PDU placement doesn’t match off-the-shelf hardware.
- Vertical managers (both sides, full height where space allows)
- Horizontal managers (1U/2U, one per patch panel to switch connection)
- Brush strips and grommets at all cable entry points
- D-rings, cable rings, and mounting hardware for mid-run support
How Should You Lay Out And Route Rack Cabling?
The three-zone rule is the layout every experienced rack builder defaults to: side managers carry vertical runs, mid-managers handle horizontal transitions, and the center of the rack stays open as an airflow corridor. Operator guides describe this same three-zone approach as the baseline for a rack technicians can actually service without disturbing airflow.
Mount vertical managers before any equipment goes in. Retrofitting them around live switches always costs more time than doing it first. Decide early whether cable enters from overhead or underfloor, because that decision drives where your service loops need to sit.
The routing pattern that keeps a rack legible follows one path: horizontal manager to vertical manager to destination port. Never let cable drape across the front of a switch just because it’s the shortest physical distance. Installation sequence guidance puts vertical managers on both sides before equipment goes in and horizontal managers between every patch panel and the switch it feeds, for a reason: retrofitting either one later means unracking gear you just installed.
A practical mounting sequence looks like this:
- Install vertical managers on both sides of the rack frame.
- Mount patch panels near the top, leaving clear entry for overhead or underfloor cable.
- Install horizontal managers directly below each patch panel.
- Mount switches below their corresponding horizontal manager.
- Route cable in the horizontal to vertical to destination pattern, never diagonally across open rack space.
Pro Tip: If you can’t read a port label or see a switch’s status LED without physically moving a cable, the rack isn’t done. That visibility test catches bad cable dress faster than any checklist.
What Cable Lengths And Bend Limits Should You Follow?
Length choice matters more than most technicians give it credit for. In-rack patch cables should run 1 to 3 feet; cross-rack connections typically need 5 to 7 feet. Buy the shortest length that reaches the destination with a clean service loop, not the length that happens to be in stock.
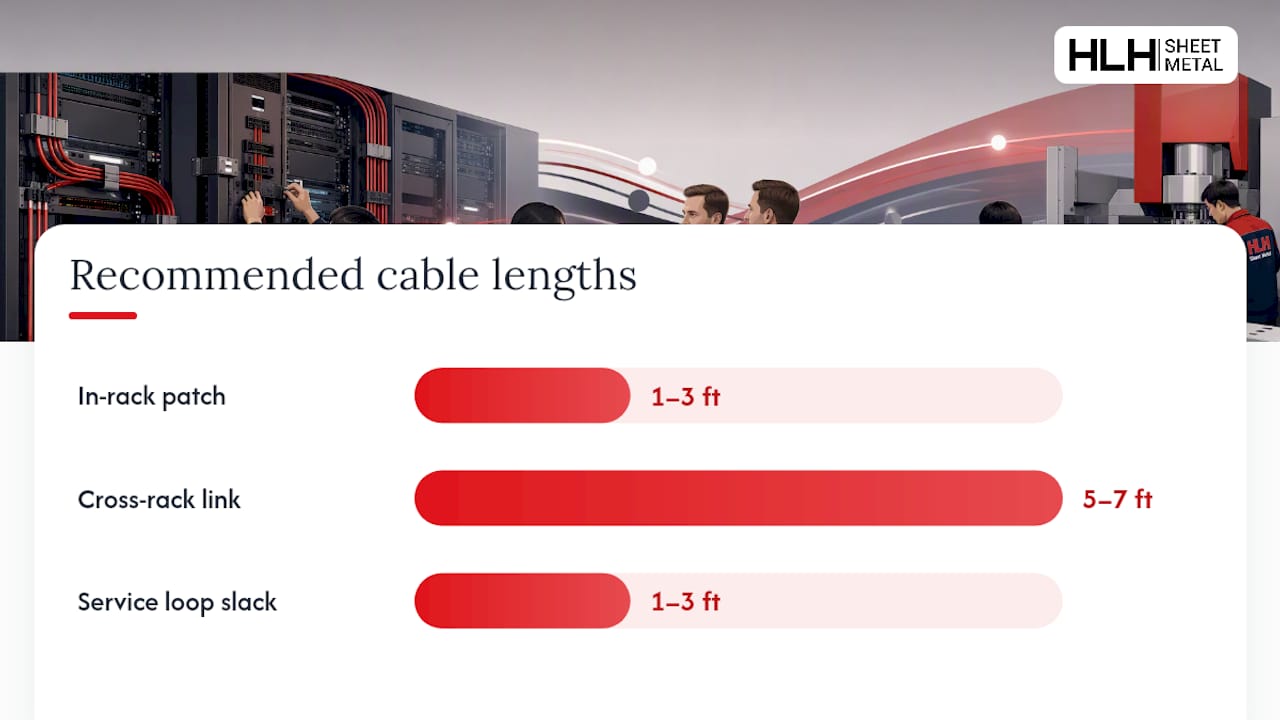
Service loops themselves should run 1 to 3 feet of slack, coiled and secured inside the vertical manager, never draped through the airflow path where they block exhaust or intake. Fiber cable is even less forgiving of tight bends than copper. Respect the minimum bend radius printed on the jacket, and never let a fiber run rest on a sharp equipment edge.
PoE bundles carry a real thermal limit that gets ignored until switches start throttling. Guidance on heat accumulation in PoE bundles recommends capping PoE+ bundles around 24 cables, while PoE++ runs at 60 to 90 watts push that ceiling down closer to 12 cables per bundle. Above that, heat builds inside the bundle core and can trigger power throttling on the switch side.
- In-rack patch cables: 1 to 3 feet
- Cross-rack cables: 5 to 7 feet
- Service loop slack: 1 to 3 feet, stored in the vertical manager
- PoE+ bundle limit: roughly 24 cables; PoE++ bundle limit: roughly 12 cables
Standardizing on Cat6A for any run carrying high-power PoE gives you thermal headroom that Cat6 or Cat5e simply doesn’t have.
What Belongs On A Cable Label And In A Cable Map?
Label both ends of every cable, not just the end that’s convenient to reach. A naming convention like Site-Room-Row-Rack-Panel-Port gives every technician enough context to trace a run without opening a spreadsheet first. Recommended practice calls for machine-printed, self-laminating wrap labels over handwritten tape, because handwriting fades and peels under rack heat within months.
A cable map needs to record more than just the endpoints. At minimum, track:
- Cable ID and both endpoints
- Cable type (Cat6A, OM4 fiber, etc.)
- Length
- Install date
- Purpose or circuit assignment
Spreadsheets work fine for a handful of racks. Once you’re managing dense, multi-rack builds, DCIM platforms that offer 3D visualization and port-level validation earn their license cost. That kind of platform lets you plan a cable path and confirm port availability before a technician ever touches a patch cord, turning what used to be reactive troubleshooting into planning done at a desk. Good documentation shortens a 45-minute outage investigation into a five minute lookup, and it’s the only reliable input for capacity planning when a new rack of switches needs power and port allocations mapped in advance.
What Tools And Habits Keep A Rack Manageable Long Term?
Velcro or hook-and-loop strap is the standard fastener for a reason: it comes off in seconds when you need to add or remove a cable. Zip ties don’t. Cutting a zip tie off a live bundle risks nicking a jacket, and technicians in a hurry often just add another cable rather than untie the bundle correctly.
A minimum working toolkit covers most rack maintenance:
- A label printer loaded with self-laminating wrap labels
- A cable tester for verifying continuity after any change
- Stocked patch cords in the standard lengths your rack actually uses
- A punch-down tool for patch panel terminations
Build routine checks into your maintenance calendar. Walk the rack and confirm you can still see every port LED and label without moving cable. Check PoE bundle temperature by hand on any bundle running above 12 to 24 cables, depending on power class. Update the cable map immediately after any change, not at the end of the week when half the details are already forgotten.
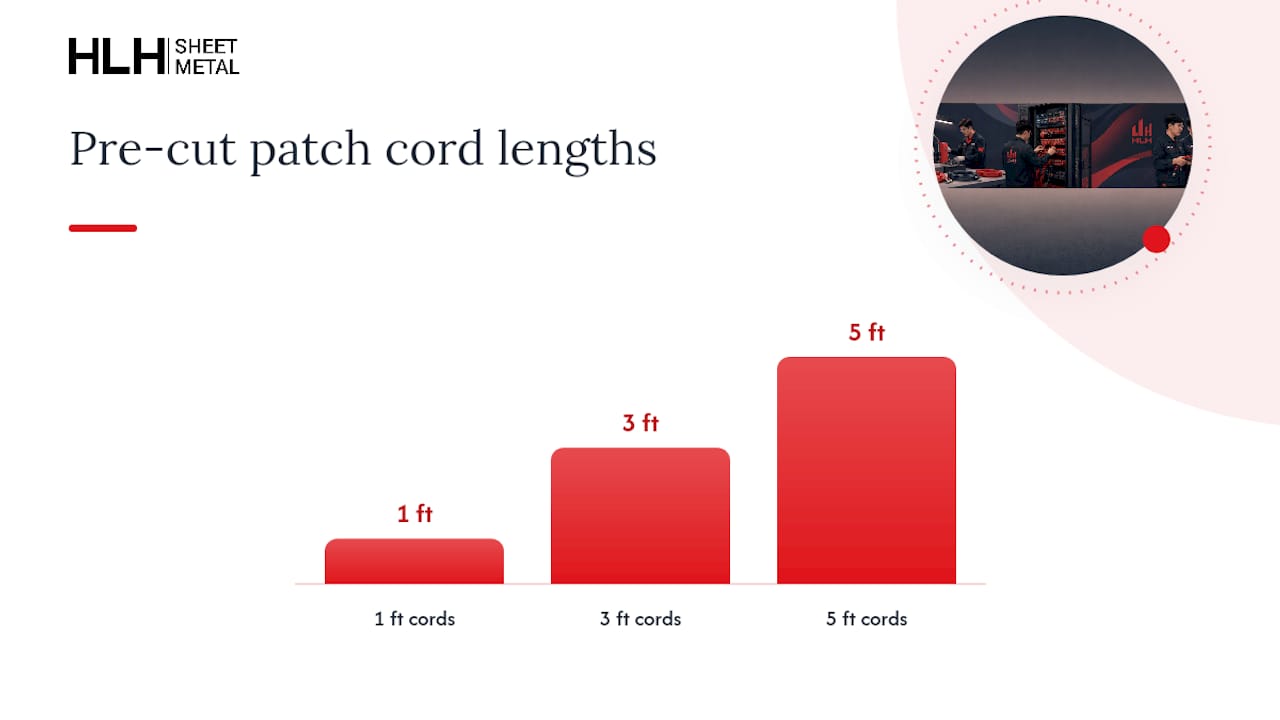
Pro Tip: Keep a small stock of pre-cut 1, 3, and 5 foot patch cords on a shelf near the rack. Technicians who have to walk to a supply closet for the right length will grab whatever’s closest instead, and that’s how service loops turn into a mess of excess slack.
When Does A Rack Need Custom-fabricated Cable Management Parts?
Off-the-shelf managers cover most builds, but nonstandard rack depths, integrated PDU mounting, weatherproof outdoor enclosures, and high-density bespoke layouts often don’t fit any catalog part. That’s where custom sheet metal fabrication makes sense instead of forcing a standard bracket into a rack it wasn’t designed for.
Custom sheet metal fabrication can build welded D-ring assemblies, custom finger-duct depths, and integrated grommet panels sized to the exact rack being deployed. Work runs through ISO-certified quality assurance, and multiple manufacturing plants can support both rapid prototyping and full production runs without switching suppliers between the two stages. For teams sourcing custom enclosures, that same fabrication approach applies to full custom server chassis built around specific airflow and cable routing requirements rather than adapted from a generic chassis design.
What Actually Moves The Needle On A Rack Build
The single highest-return action in any rack build is installing vertical and horizontal managers, and labeling every port, before equipment goes in. Everything else, including fiber versus copper debates and brand preferences on brush strips, is secondary.
The operational rule I’d put on a sticker above every rack: correct cable length, plus Velcro, plus both-end labeling, cuts emergency fixes by a wide margin. Most 2 AM troubleshooting calls trace back to one of those three being skipped at install time, not to some exotic hardware failure.
— Nash
Custom Rack Cabinets And Cable-management Fabrication From HLH Sheet Metal
Catalog managers solve most rack problems, but nonstandard cabinet depths, integrated PDU cutouts, or weatherproof outdoor enclosures usually need a fabricator willing to build to your drawing instead of asking you to adapt to theirs. Custom fabricators offer server rack cabinets, welded D-ring assemblies, and finger ducts sized to the exact depth and port layout a build requires, backed by ISO-certified quality assurance and rapid prototyping so a first sample doesn’t take months to see. For teams weighing airflow against cabinet depth, the cabinet design breakdown covers how depth and vent placement interact with cable routing. If your next build doesn’t fit an off-the-shelf part, request a quote on a custom server rack cabinet and describe the layout you’re trying to solve for.
FAQ
What Is The Correct Order To Install Rack Cable Management Hardware?
Mount vertical managers on both sides first, then patch panels, then horizontal managers directly below each panel, then switches. Retrofitting managers around installed equipment wastes far more time than installing them first.
How Long Should Patch Cables Be In A Server Rack?
In-rack patch cables should run 1 to 3 feet, and cross-rack connections typically need 5 to 7 feet. Always choose the shortest length that reaches the destination with a clean service loop.
How Many Cables Can Safely Go In One Poe Bundle?
PoE+ bundles should stay around 24 cables, while higher-power PoE++ bundles at 60 to 90 watts should drop closer to 12 cables to avoid heat buildup that can throttle switch power output.
Should I Use Zip Ties Or Velcro For Rack Cable Management?
Velcro or hook-and-loop strap is the standard because it can be removed and readjusted without cutting, unlike zip ties, which risk nicking cable jackets when removed.
When Does A Rack Need Custom Cable Management Parts Instead Of Standard Ones?
Nonstandard rack depths, integrated PDU mounting, weatherproof enclosures, or high-density bespoke layouts usually require custom-fabricated brackets, D-rings, or finger ducts rather than catalog parts.
Recommended
- Rack Cable Management – Sourcing Custom Server Chassis From China
- Custom Server Rack Cabinets Manufacturer in China
- Custom Network Cabinets Manufacturer in China
- Outsource to China: RFQ Ready Server Rack Cabinet Design for Airflow

